
St. Louis Tattoo News, Events & Education
Flash sales, Friday the 13th events, aftercare tips, and what's happening at Alchemy Tattoo Collective
St. Louis tattoo news, events, and education all in one place. Flash announcements, aftercare tips, technique breakdowns, and everything happening at Alchemy Tattoo Collective. Stay in the loop.

Why You Shouldn't Bring a Crowd to Your Tattoo Appointment
Getting tattooed with a full entourage in the room seems fun until you're twenty minutes in. Here's why coming solo (or with just one person) actually makes for a better session, for you and your artist.
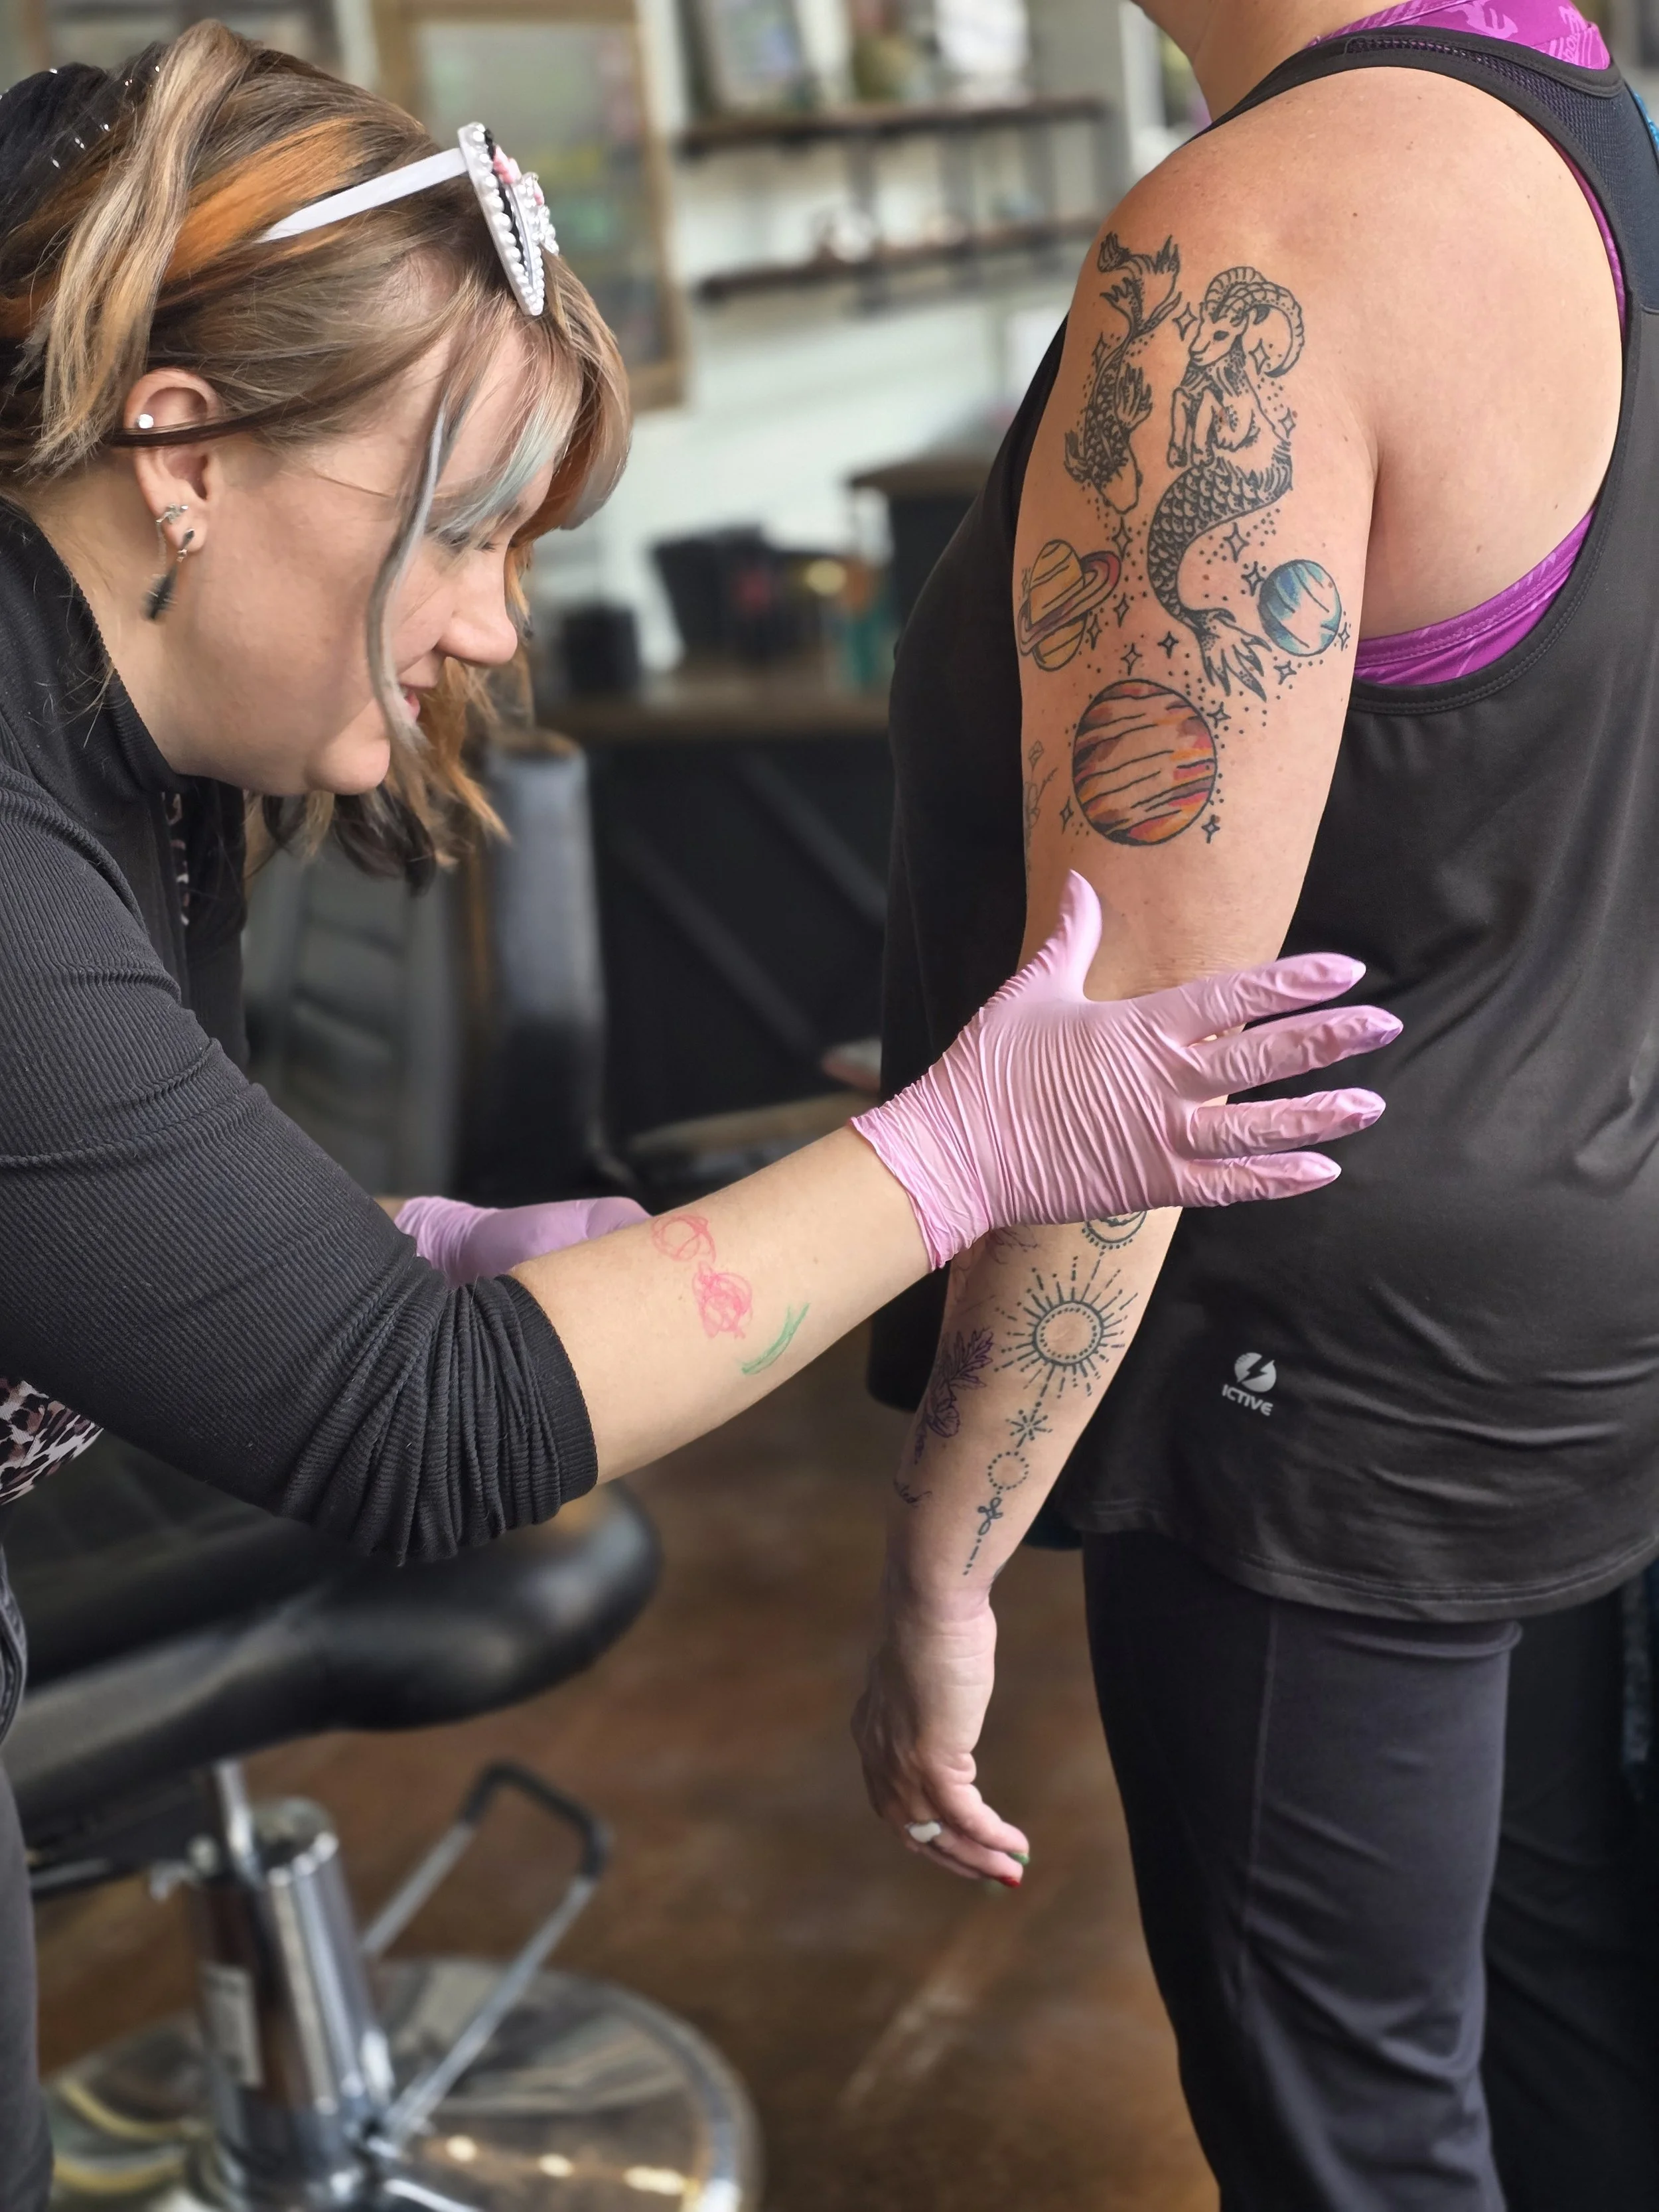
You Don't Need Ink to Transform Your Skin
Stretch marks and scars don't have to be permanent. Inkless Revision is a needle-based skin treatment that uses a tattoo machine and specialized serums to rebuild collagen, smooth texture, and fade discoloration without any ink. Learn how NSR and NSS work and whether this treatment is right for you.

What Makes a Tattoo Age Well?
Most people pick a tattoo design based on how it looks on day one. But the tattoos that still turn heads ten years later were built with something else in mind. How skin changes, how ink moves, and how a design holds up when both of those things happen at once. Here's what actually makes a tattoo age well.
Tattoo Therapy
Tattoos are not a replacement for therapy or mental health care, but for some people, they can be part of healing. This blog explores how tattooing can support self-expression, body autonomy, grief, identity, transformation, and the emotional connection between artist and client.
Tattoo Shops Near Me vs. Choosing the Right Artist in St. Louis
Searching for “tattoo shops near me” in St. Louis? Here’s how to choose the right tattoo artist, avoid common mistakes, and get a result you’ll actually love.
Tattoo Pain by Placement: What Hurts Most and Why
Thinking about tattoo placement and pain? Learn which areas usually hurt more, which tend to be easier, and what actually affects the experience.
Moving to St. Louis as a Tattoo Artist? What to Look for in a Shop
Moving to St. Louis as a tattoo artist? Learn what to look for in a shop, from culture and clientele to location, support, and long-term fit.
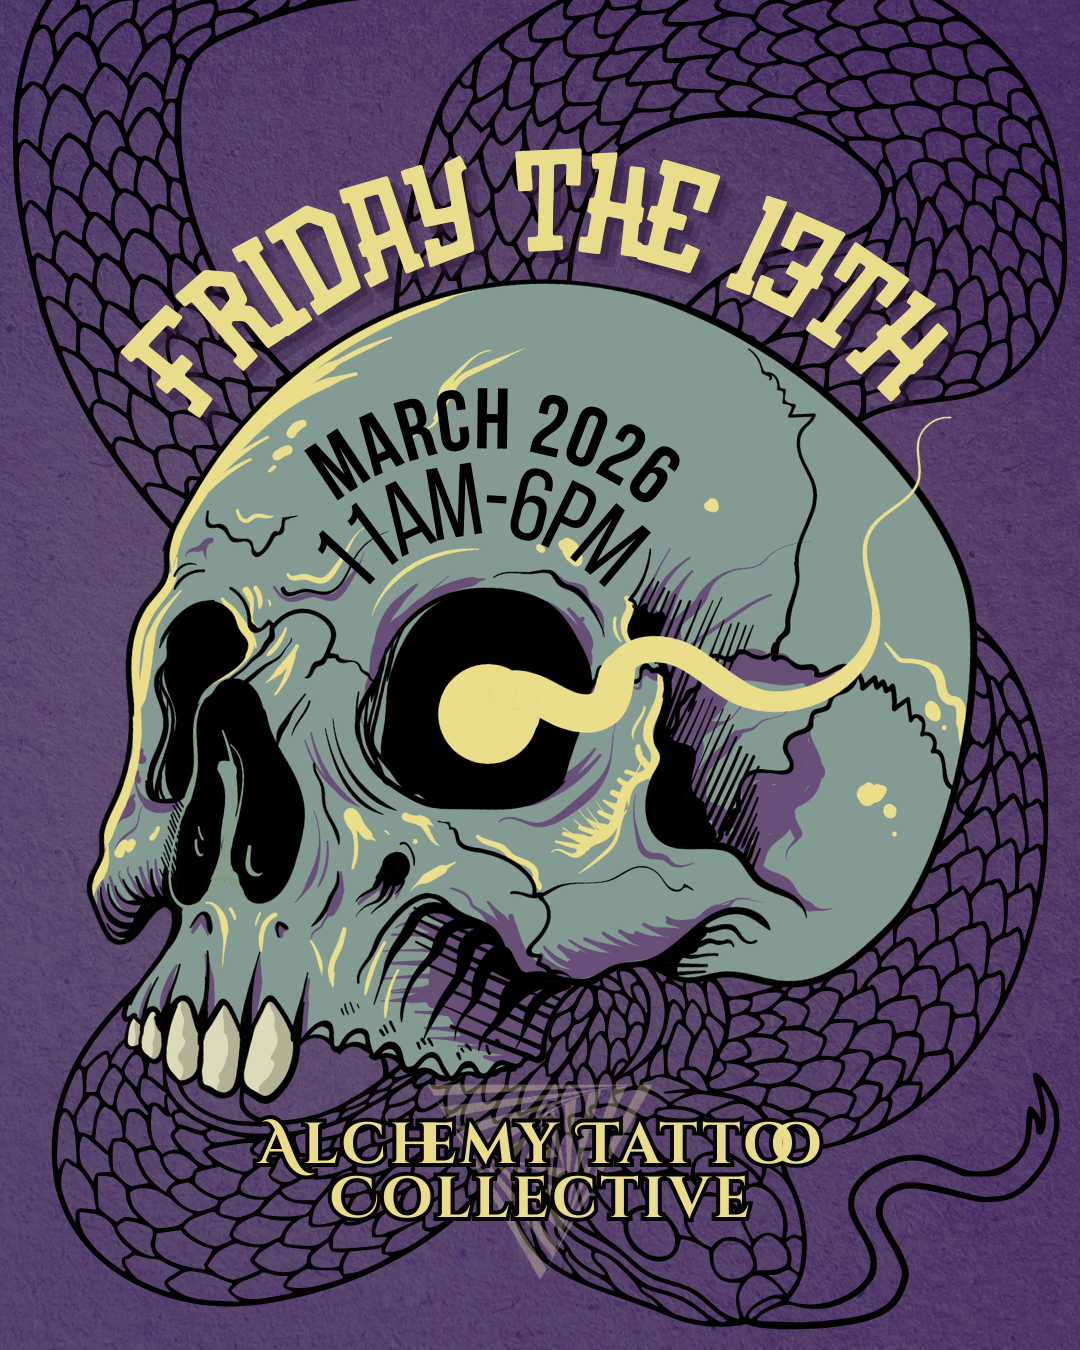
Friday the 13th Flash Tattoo Event — March 13, 2026
Our next Friday the 13th flash tattoo event in St. Louis is March 13, 2026 at Alchemy Tattoo Collective. All designs are repeatable, with the option to book flash on other days
-
July 2026
1
- Jul 16, 2026 Why You Shouldn't Bring a Crowd to Your Tattoo Appointment Jul 16, 2026
-
June 2026
2
- Jun 16, 2026 You Don't Need Ink to Transform Your Skin Jun 16, 2026
- Jun 10, 2026 What Makes a Tattoo Age Well? Jun 10, 2026
-
May 2026
1
- May 5, 2026 Tattoo Therapy May 5, 2026
-
April 2026
1
- Apr 29, 2026 Tattoo Shops Near Me vs. Choosing the Right Artist in St. Louis Apr 29, 2026
-
March 2026
2
- Mar 30, 2026 Tattoo Pain by Placement: What Hurts Most and Why Mar 30, 2026
- Mar 24, 2026 Moving to St. Louis as a Tattoo Artist? What to Look for in a Shop Mar 24, 2026
-
February 2026
1
- Feb 27, 2026 Friday the 13th Flash Tattoo Event — March 13, 2026 Feb 27, 2026
-
January 2026
2
- Jan 20, 2026 Friday the 13th Tattoo Flash Event in St. Louis Jan 20, 2026
- Jan 1, 2026 Is It Normal?The Ultimate Guide to Tattoo Healing (and When to Call Us) Jan 1, 2026
-
December 2025
2
- Dec 28, 2025 South City Location Update Dec 28, 2025
- Dec 8, 2025 Does Your Old Tattoo Need a Cover Up or Laser Removal? Dec 8, 2025
-
November 2025
1
- Nov 20, 2025 Curated Piercings: How Do You Go From Mismatched Studs To A Cohesive Ear? Nov 20, 2025
-
October 2025
1
- Oct 10, 2025 Tattoo Etiquette 101: What Your Artist Wishes You Knew Oct 10, 2025
-
September 2025
3
- Sep 9, 2025 How Long Do Tattoos Take to Heal A Week-by-Week Healing Guide Sep 9, 2025
- Sep 4, 2025 Spooky Tattoo Party in St. Louis – Celebrate 10 Years of Alchemy Tattoo Collective Sep 4, 2025
- Sep 2, 2025 Piercing Aftercare Made Simple: A 7-Day Healing Timeline for a Trouble-Free Recovery Sep 2, 2025
-
August 2025
4
- Aug 26, 2025 Can You Go to the Gym After Getting Tattooed? Aug 26, 2025
- Aug 19, 2025 Can You Get Tattooed While Pregnant or Breastfeeding? Aug 19, 2025
- Aug 12, 2025 Cybersigilism to Color Comebacks: 9 Tattoo Styles Owning 2025 Aug 12, 2025
- Aug 3, 2025 The Biological Process of Tattoo Healing: Why Tattoos Fade and Blur Over Time Aug 3, 2025
-
July 2025
1
- Jul 26, 2025 Tattoo Pain and Your Period: How the Menstrual Cycle Affects Pain Sensitivity Jul 26, 2025
-
June 2025
3
- Jun 23, 2025 New Permanent Makeup Services Now Available with Nicole in St. Louis Jun 23, 2025
- Jun 6, 2025 Friday the 13th, St. Louis 2025 Jun 6, 2025
- Jun 3, 2025 Visibility and Community: Pride Stories from Our Tattoo Studio Jun 3, 2025
-
May 2025
1
- May 10, 2025 Tattoo Pricing in St. Louis: Comprehensive Guide to Costs and Factors May 10, 2025
-
March 2025
2
- Mar 20, 2025 Tattoo Trend: Postage stamps Mar 20, 2025
- Mar 19, 2025 Not Just luck - The Raffle Mar 19, 2025
-
February 2025
4
- Feb 21, 2025 Not Just luck - tattoos for a cause Feb 21, 2025
- Feb 18, 2025 Top Tattoo Artists Visiting St. Louis Feb 18, 2025
- Feb 8, 2025 Introducing Our New Piercing Services Feb 8, 2025
- Feb 5, 2025 Your New Sunday Ritual: Walk-in Tattoos at Alchemy Feb 5, 2025
-
January 2025
2
- Jan 31, 2025 The Art of Fine Line Tattoos: Tiny Details, Big Impact Jan 31, 2025
- Jan 27, 2025 💕 Valentine’s & Palentine’s Flash Event + Piercing Special 💕 Jan 27, 2025
-
November 2024
4
- Nov 26, 2024 Designing Your Perfect Tattoo Nov 26, 2024
- Nov 19, 2024 Friday the 13th Winter Solstice Flash Event Nov 19, 2024
- Nov 11, 2024 Private Tattoo Events Nov 11, 2024
- Nov 2, 2024 2nd Annual Mental Wellness Flash Fundraiser Nov 2, 2024
-
October 2024
2
- Oct 9, 2024 Halloween Haunt Fest Oct 9, 2024
- Oct 5, 2024 What's your tattoo style? Oct 5, 2024
-
September 2024
1
- Sep 6, 2024 $130 Friday the 13th Tattoos Sep 6, 2024
-
March 2024
1
- Mar 26, 2024 Art for Autism Mar 26, 2024
-
February 2024
2
- Feb 21, 2024 Alchemy Tattoo Expands: Introducing Our Second Location in South City! Feb 21, 2024
- Feb 10, 2024 Ink on Demand: Alchemy Tattoo Opens its Doors to Walk-Ins! Feb 10, 2024
-
August 2023
1
- Aug 10, 2023 We're MOVING to the Central West End! Aug 10, 2023
-
March 2023
1
- Mar 9, 2023 Alchemy on TV! Mar 9, 2023
-
January 2023
1
- Jan 13, 2023 Sarz Fundraiser Jan 13, 2023
-
November 2022
1
- Nov 9, 2022 SUPPORT THE MATRIARCHY Nov 9, 2022
-
August 2022
1
- Aug 8, 2022 Help Us Help Others Aug 8, 2022
-
August 2021
1
- Aug 31, 2021 In the News Aug 31, 2021
-
February 2021
1
- Feb 16, 2021 Covid-19 Precautions Feb 16, 2021
-
June 2020
1
- Jun 14, 2020 Farewell Justine! Jun 14, 2020
-
February 2019
1
- Feb 14, 2019 5 Portfolio Tips To Get A Tattoo Apprenticeship Feb 14, 2019
-
September 2018
1
- Sep 26, 2018 ATC is Moving Sep 26, 2018
-
July 2018
2
- Jul 11, 2018 Friday the 13th ONLINE Flash Sale Jul 11, 2018
- Jul 2, 2018 Artist Updates Jul 2, 2018
-
April 2018
2
- Apr 23, 2018 Apprentice Model Contest Apr 23, 2018
- Apr 9, 2018 How To Get A Tattoo Apprenticeship Apr 9, 2018
-
March 2018
1
- Mar 31, 2018 Why You Should Leave Your Family at Home for Your Tattoo Mar 31, 2018
-
January 2018
1
- Jan 22, 2018 $30 TATTOOS Jan 22, 2018
-
October 2017
1
- Oct 4, 2017 The Alchemy of Earth Alchemy Tattoo Oct 4, 2017
-
July 2017
1
- Jul 14, 2017 Enter To Win A Free Tattoo! Jul 14, 2017
-
June 2017
2
- Jun 27, 2017 It's a Girl... and a Boy!! Jun 27, 2017
- Jun 4, 2017 Guest Artist, Josh Goor Jun 4, 2017
-
May 2017
1
- May 3, 2017 Guest Piercer, Cat May 3, 2017
-
November 2016
1
- Nov 4, 2016 Riverfront Times Cover! Nov 4, 2016
-
October 2016
1
- Oct 12, 2016 How to Avoid Common Mistakes When Getting Your First Tattoo Oct 12, 2016
-
August 2016
1
- Aug 15, 2016 -Aaron Wall has joined your party! Jake Bailey has left your party- Aug 15, 2016
-
June 2016
1
- Jun 4, 2016 Win a FREE tattoo fade! Jun 4, 2016
-
April 2016
1
- Apr 23, 2016 River Front Times feature & the hunt for a new team member. Apr 23, 2016
-
January 2016
1
- Jan 24, 2016 Artist Spotlight: Valencia, Cammeron, and Susie Jan 24, 2016
-
December 2015
3
- Dec 29, 2015 Magazine Features, Sign Painting, and the New Year. Dec 29, 2015
- Dec 17, 2015 Cammeron Damnit, Tea Cups, and Dream Creatures. Dec 17, 2015
- Dec 10, 2015 Print Bazaar, Gift Certificates, and Jaguars. Dec 10, 2015
Archive
- July 2026
- June 2026
- May 2026
- April 2026
- March 2026
- February 2026
- January 2026
- December 2025
- November 2025
- October 2025
- September 2025
- August 2025
- July 2025
- June 2025
- May 2025
- March 2025
- February 2025
- January 2025
- November 2024
- October 2024
- September 2024
- March 2024
- February 2024
- August 2023
- March 2023
- January 2023
- November 2022
- August 2022
- August 2021
- February 2021
- June 2020
- February 2019
- September 2018
- July 2018
- April 2018
- March 2018
- January 2018
- October 2017
- July 2017
- June 2017
- May 2017
- November 2016
- October 2016
- August 2016
- June 2016
- April 2016
- January 2016
- December 2015